
Manual testing in ServiceNow is slow, repetitive, and error-prone—especially when validating Incident forms. This is where ServiceNow Automated Test Framework (ATF) shines.
In this guide, you’ll learn how to automatically test Incident creation and form validation using ATF with a clean, real-world example. We’ll cover 4 practical steps that you can reuse in any ServiceNow instance.
This tutorial is ideal for:
- ServiceNow Admins
- ATF users
- QA / Automation engineers
- Developers working with Incidents
Prefer watching instead of reading? This short video walks through the full ATF Incident test step by step.
What Is ServiceNow Automated Test Framework (ATF)?
Automated Test Framework (ATF) is a native ServiceNow feature that allows you to automate UI and server-side testing without external tools.
With ATF, you can:
- Validate form behavior
- Test business rules and UI policies
- Catch regressions early
- Reduce manual testing effort
In this post, we focus on Incident form automation, which is one of the most common use cases.
Test Scenario Overview
We will create an ATF test that verifies:
- A specific user can log in
- The user can open a new Incident form
- Mandatory and default field values are validated
- Field states (read-only, mandatory, visible) behave correctly
Before start
We will login to our Servicenow Dashboard and then follow the steps mentioned in the photo
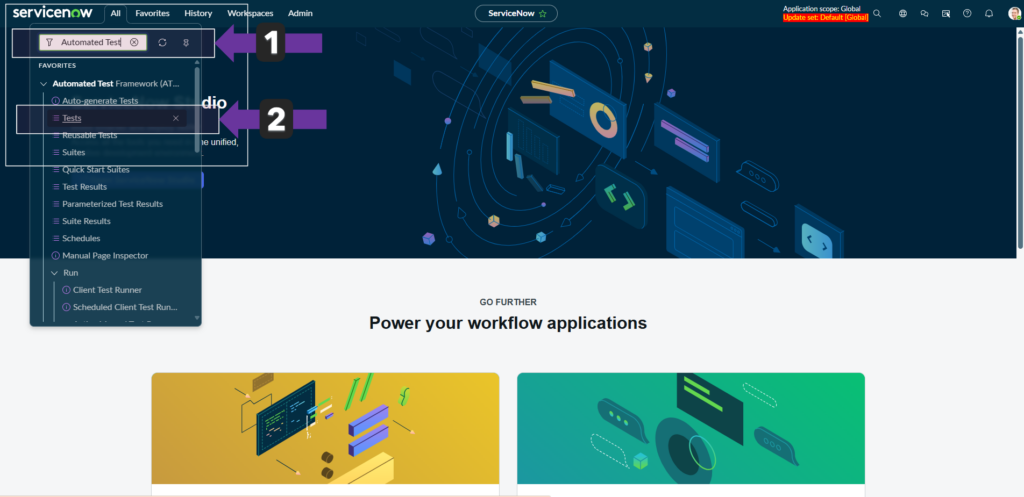
- Click on the All
- Then in the search bar we have to type “Automated Test Framework”
- Now we have to click on the “Tests” to create a new test
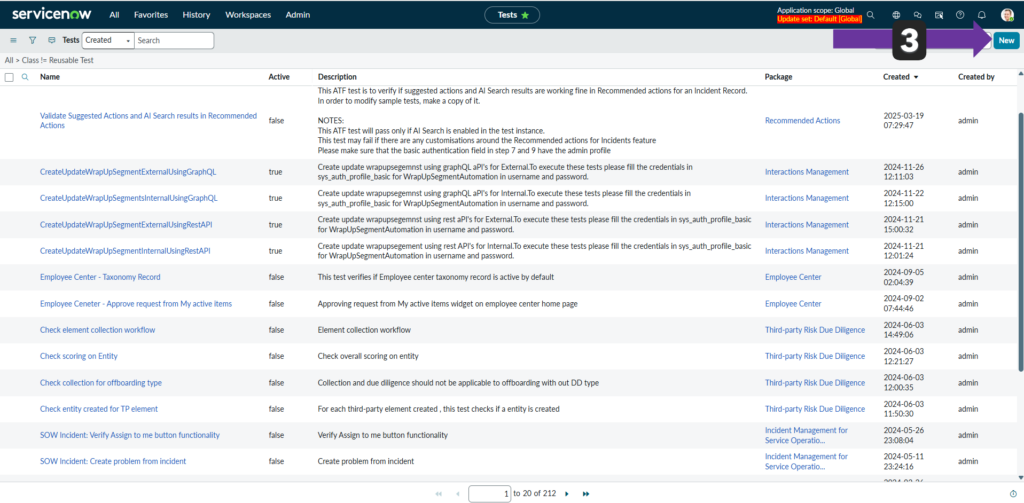
- Now we have to click on the “New”
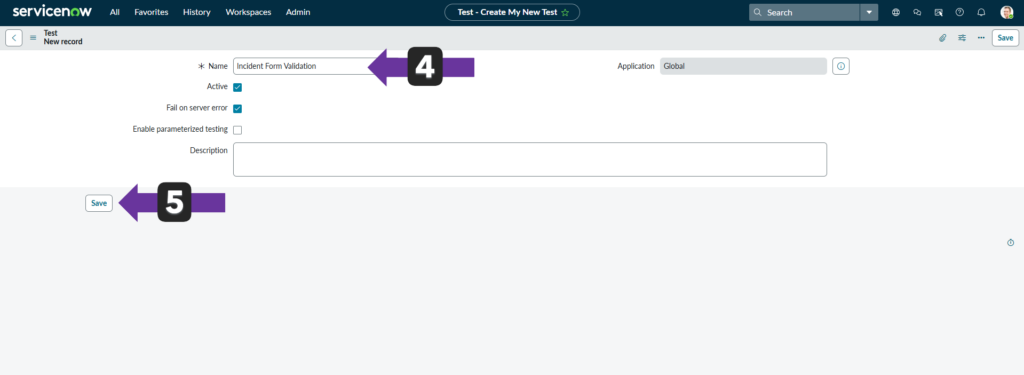
- Here in this step we have to set a name of our test form. So i give it a name of “Incident Form Validation”
- After then we have to click on the “Save” button.
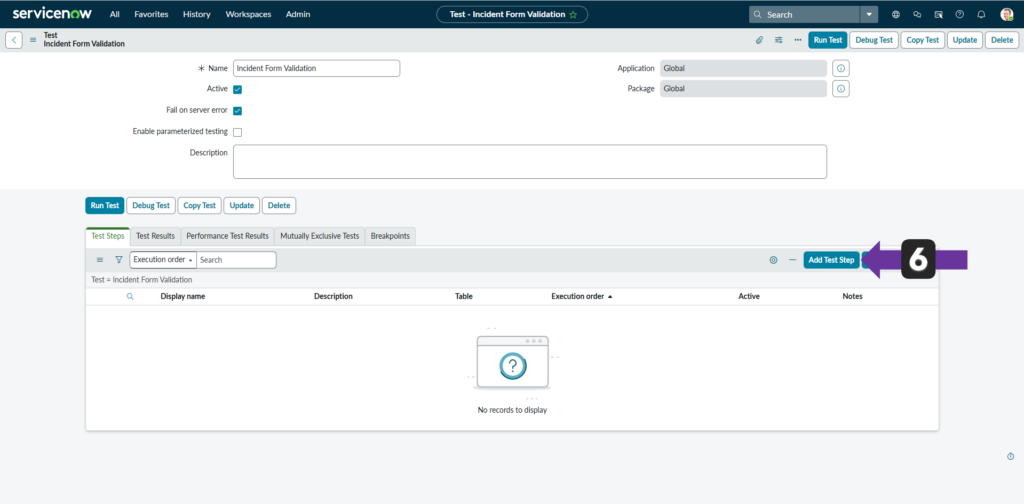
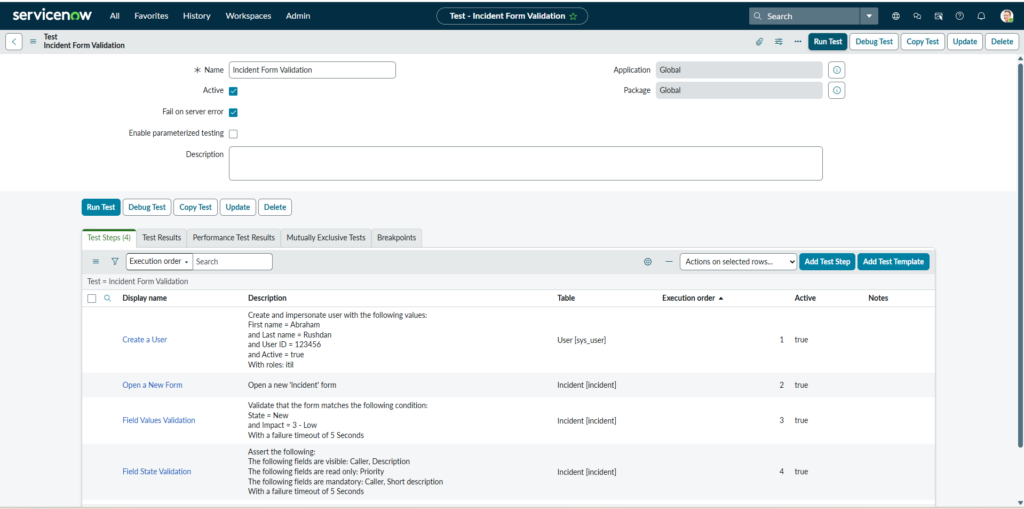
After this new screen will be appears from here we will start adding our test steps. To add the new steps we have to begin with the “Add Test Step” button. Let’s start by adding the required steps.
Step 1: Create a Test User for ATF
ATF tests should always run with a dedicated test user instead of admin.
Why this matters
- Simulates real user behavior
- Prevents false positives
- Makes tests reliable across instances
How to create the user
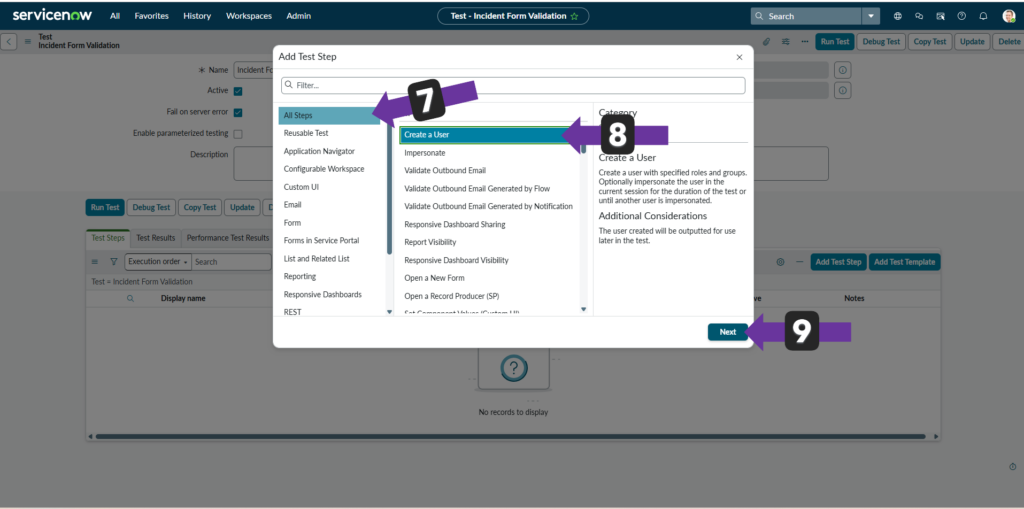
- We will select All Steps
- Now we will select “Create a User”
- Now click on the “Next” button.
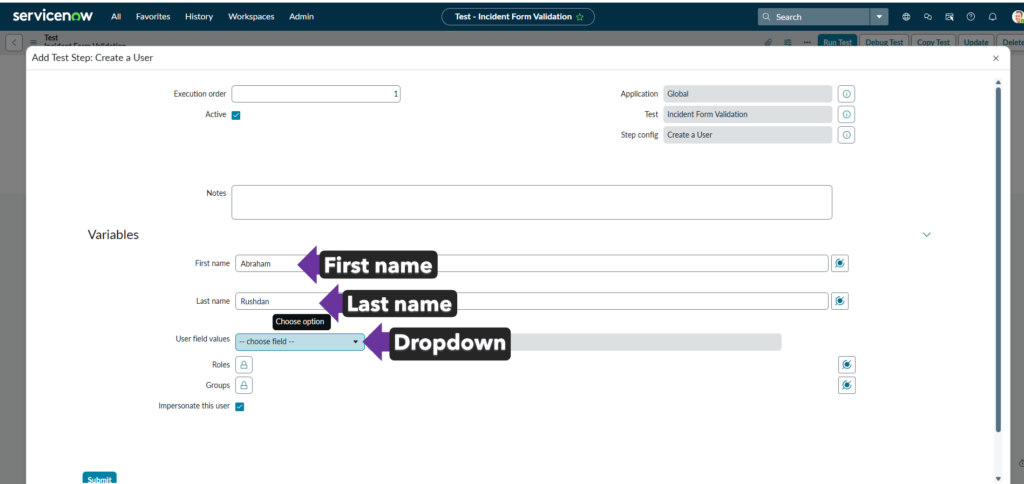
- Set the First name, Last name
- Set some extra field for the user by click on the User Field values dropdown section.
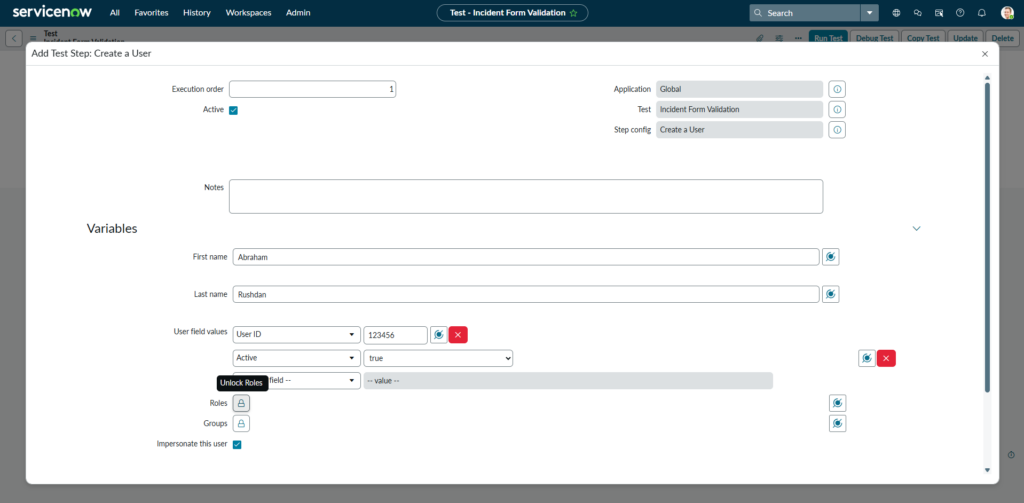
- Here i pick the User ID and assign a ID example “123456”
- Then i pick the Active status of the user as True
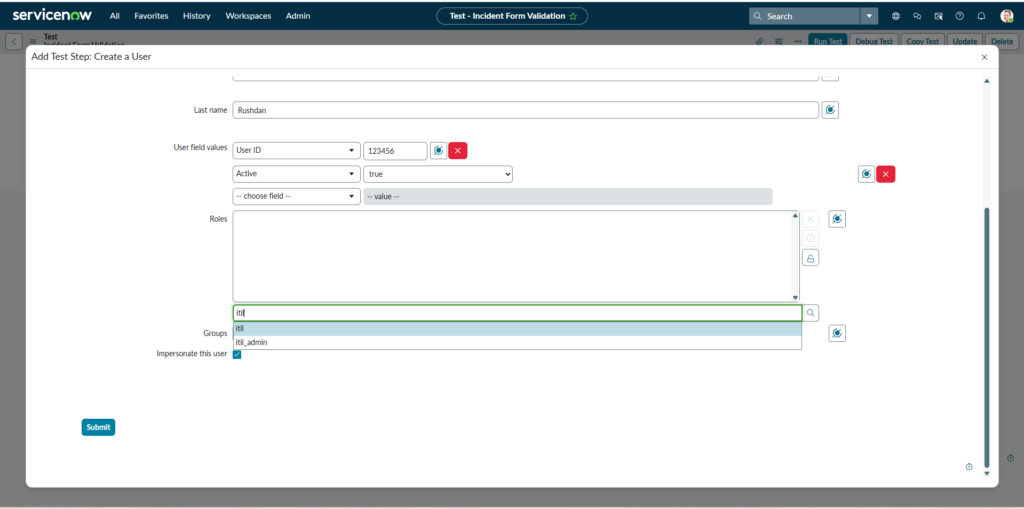
- Here in this part i assign this user roles as a “ITIL” user. So this user can handle all the procedures of Incidents.
- We will impersonate the current user so the tick on the “Impersonate this user” will be remain same.
- Then we have click on the “Submit” button to save the step.
📌 ATF Best Practice: Never use admin in UI tests.
Step 2: Open a New Incident Form Using ATF
Now we create and open the Incident form.
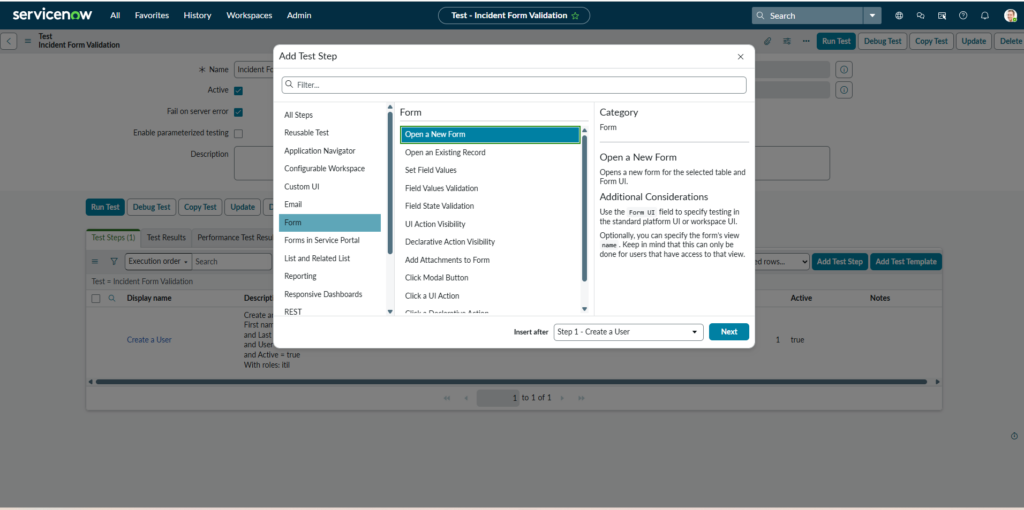
- Click Add Test Step
- From the left side of the pop up choose “Form → Open a New Form”
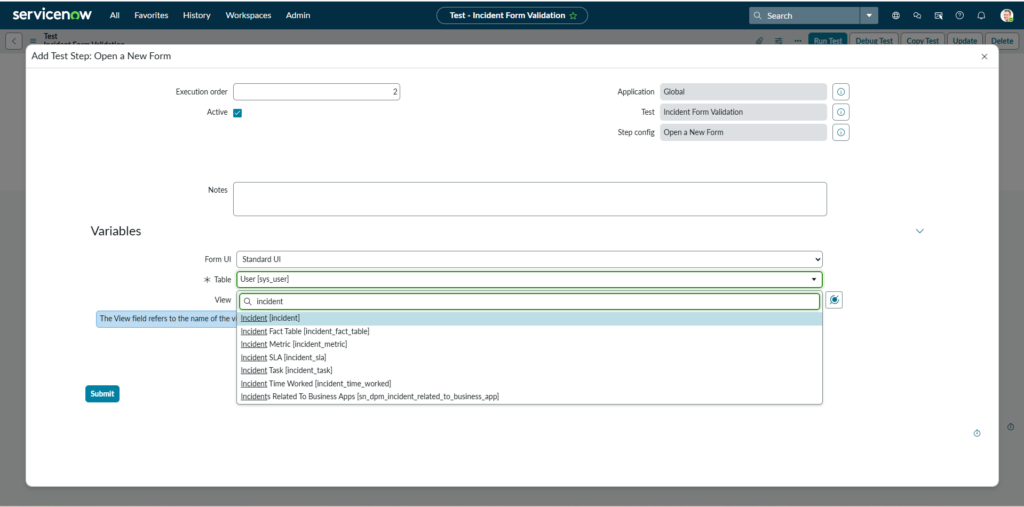
- From this table dropdown we have to pick the “Incident” table by typing in the search bar.
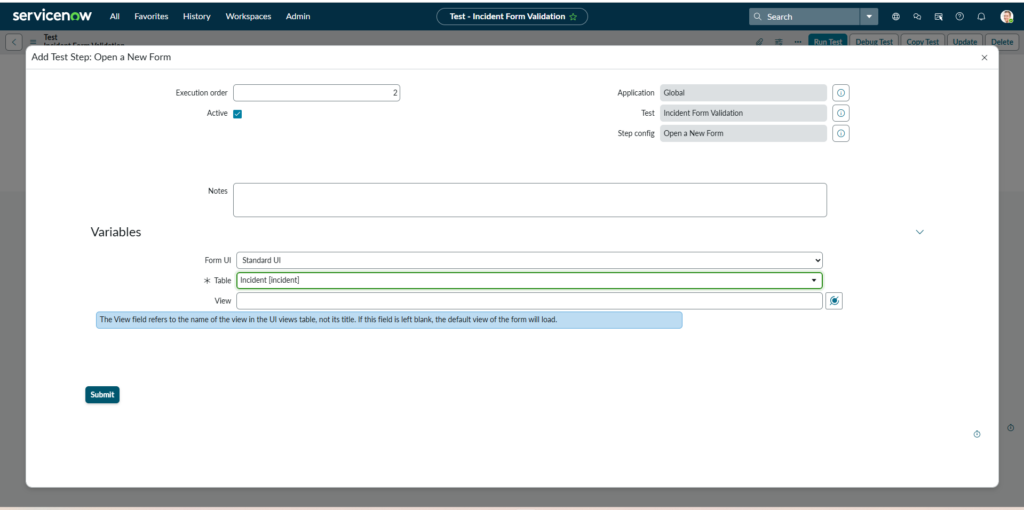
- Now click on the “Submit” button to save the step.
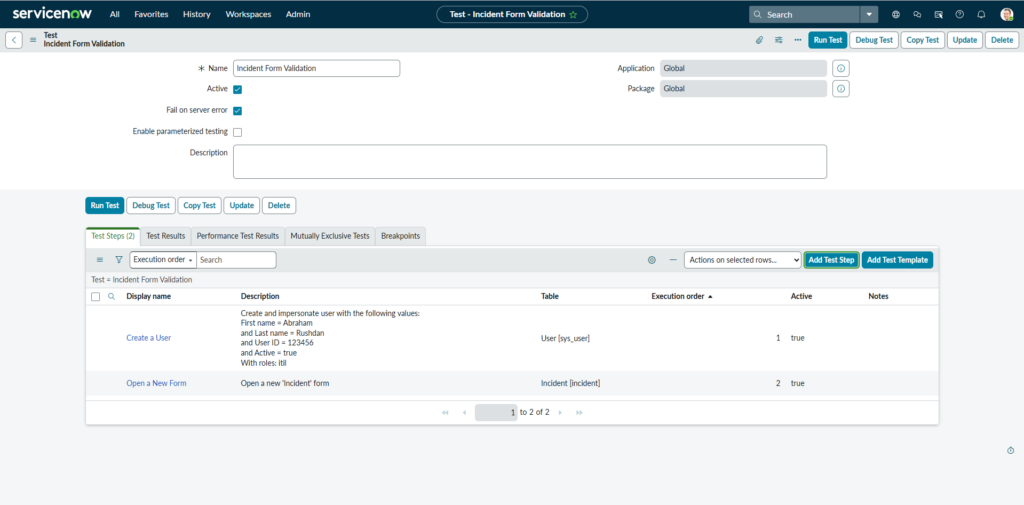
The “Incident” form is added into our test. This step ensures the form loads successfully.
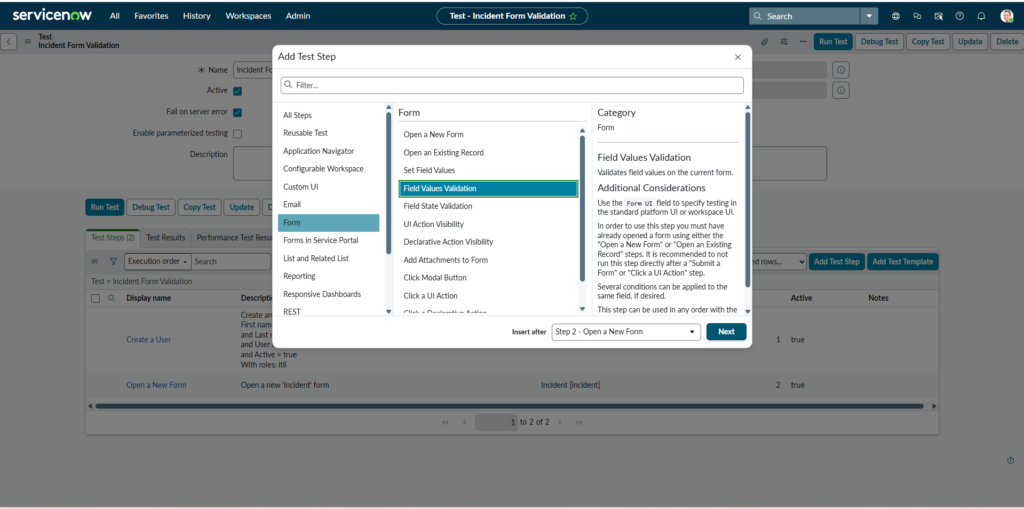
Step 3: Validate Incident Field Values
Now we verify that the form behaves correctly when values are entered or missing. So in this step we will select “Form → Field Values Validation”
Example validations
- State is New
- Impact is Low
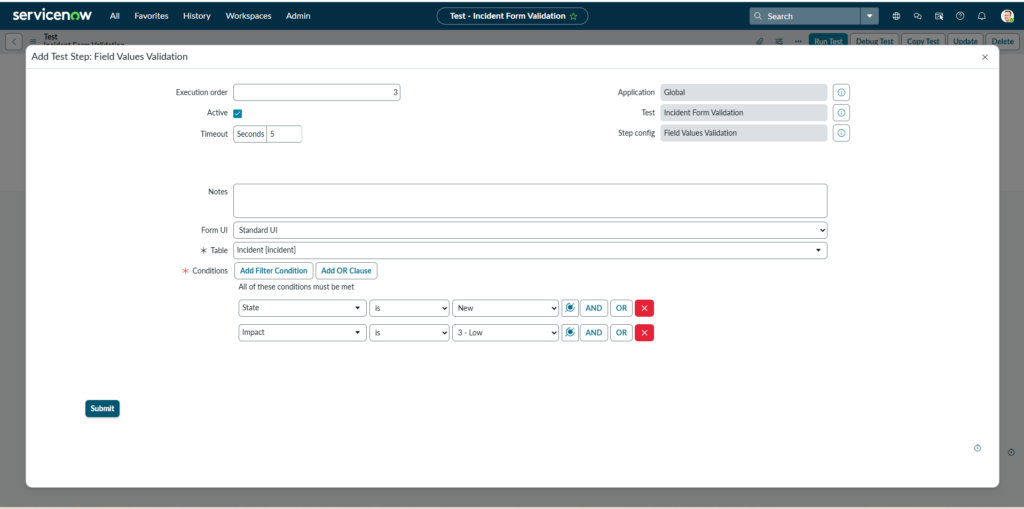
- From Conditions we have to click on “Add Filter Condition” then pick the “State” is “New”
- Impact is Low
Now we have to “Submit” the form to save.
📌 This confirms:
- Default values are correct
- Fields accept valid input
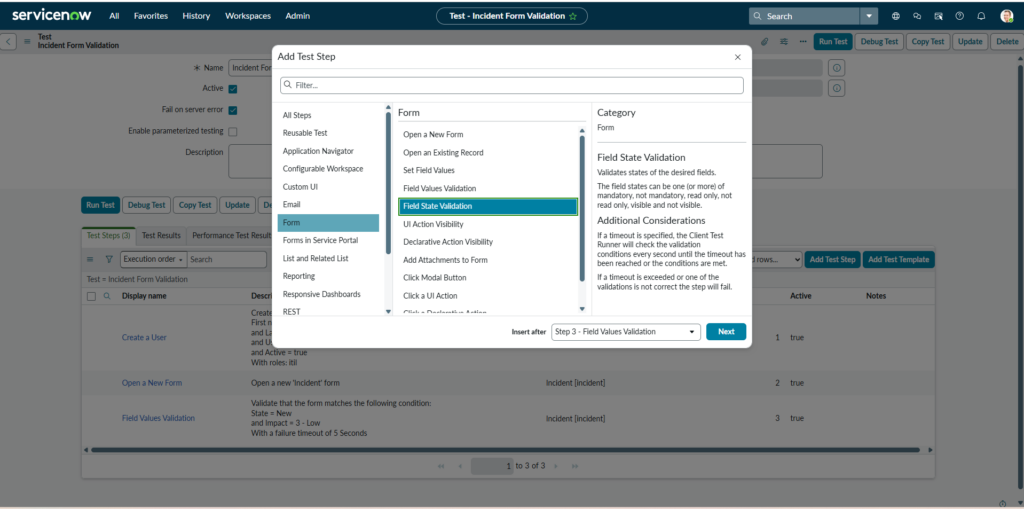
Step 4: Validate Incident Field State (Mandatory, Read-Only, Visible)
This is where ATF becomes extremely powerful.
Common field state checks
- Is
Caller,Descriptionvisible? - Is
Priorityread-only? - Is
Caller, Short Descriptionmandatory?
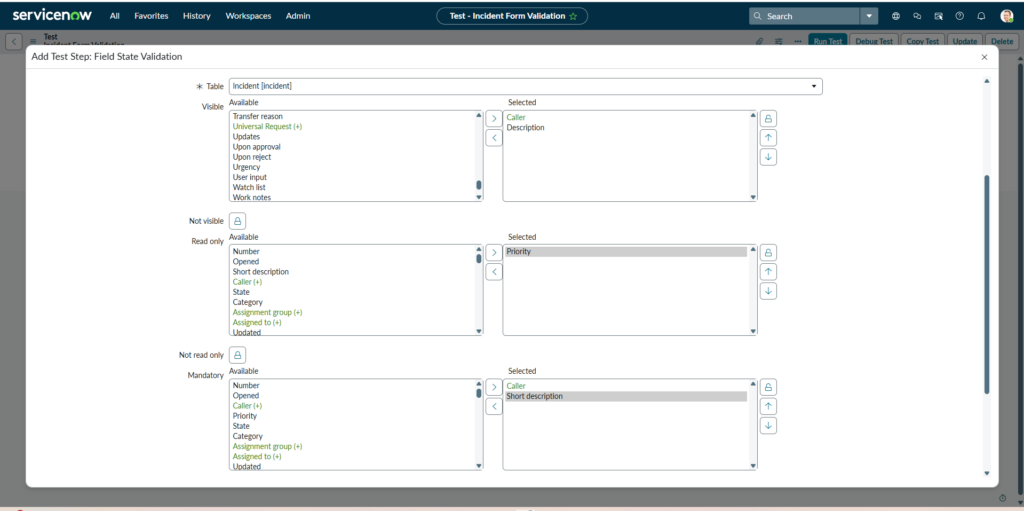
Add ATF Step:
Lets choose the Caller, Description from the visible section. Priority from the read only section and Caller, Short Description from the Mandatory section. After all of them clcik on the “Submit” button.
Our test steps are ready to run. These checks automatically fail if UI Policies or Client Scripts break the form.
Run the Test and Review Results
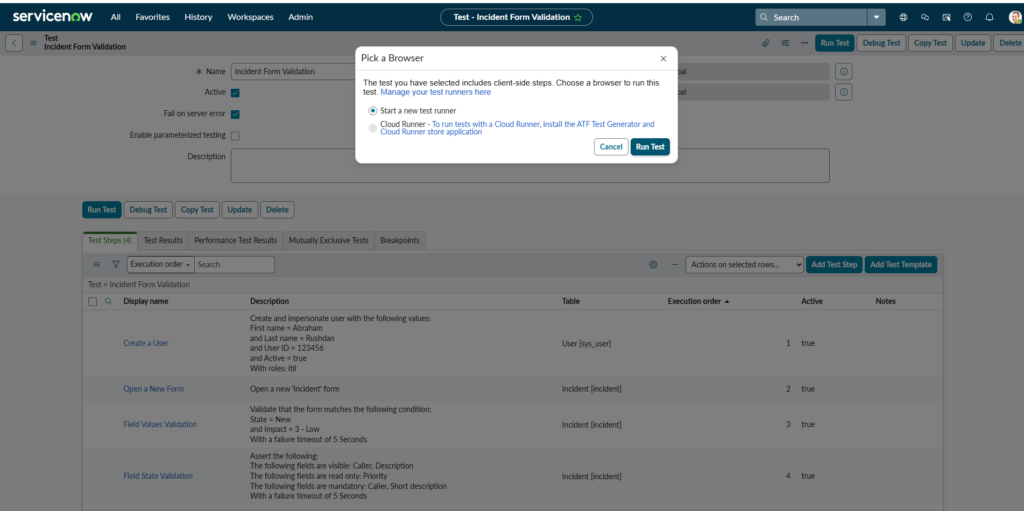
- Click Run Test
- In this step choose “Start a new test runner”
- Then click on the “Run Test” button.
A new window will be open with the test execution status.
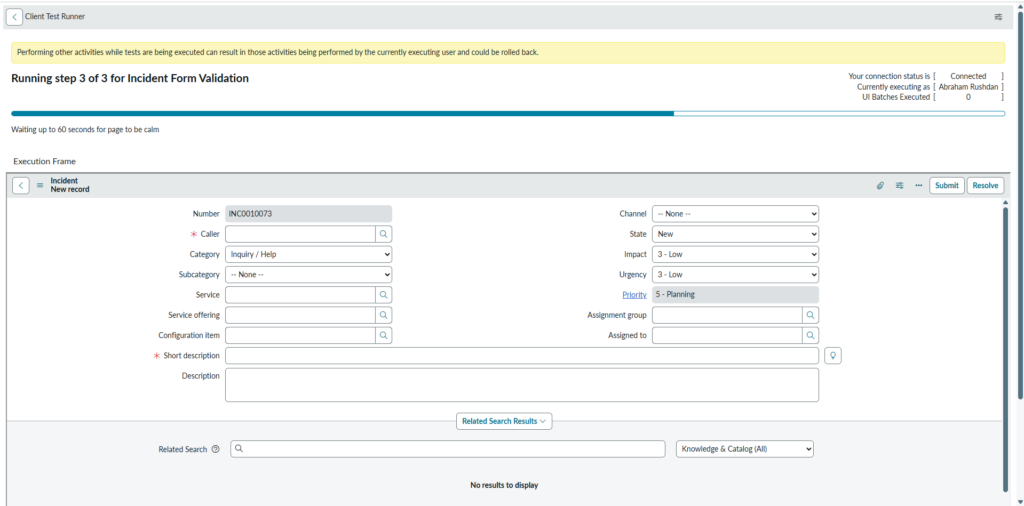
- Monitor execution in real time
- Review:
- Passed steps
- Failed validations
- Screenshots and logs
After a succesful execution the result will be shown as 100% Succesful of all the step in the test run steps page by clicking on the “Go to Result” button we can see the details log, screenshot of the test.
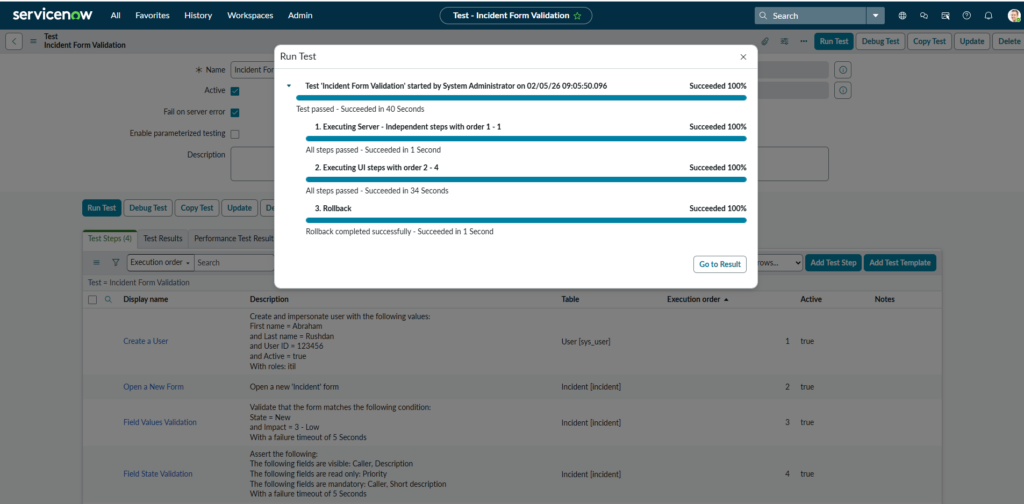
ATF provides detailed failure messages, making debugging fast and accurate.
Why You Should Use ATF for Incident Testing
Using ServiceNow ATF for Incident validation gives you:
- Faster releases
- Fewer production defects
- Confidence during upgrades
- Repeatable testing with zero manual effort
Once created, these tests can be reused across patches, upgrades, and customizations.
Final Thoughts
ServiceNow Automated Test Framework is not optional anymore—it’s essential.
By following these 4 ATF steps, you now have:
- A reusable Incident test
- Automated form validation
- A strong foundation for scaling your test suite
If you work with ServiceNow regularly, investing time in ATF will save you hundreds of hours long term.
Prefer watching instead of reading? This short video walks through the full ATF Incident test step by step.
Dawn Simmons February 6, 2026
This is just something I was looking for . Very nice tutorial. Thank you
Iqbal Mahmud February 7, 2026
You are welcome, thank you for the inspiration.